Sculpture with a function is the idea I have decided to take forward for the pathway stage, I did this as I really like the way a sculpture can look, detailed, intertwining, expressing mad ideas but I also like how products have a function, having a meaning rather than just its appearance. This is why I want to combine both of my interests together; at this stage I have no idea what type of product, the size of the sculpture or what materials I want to make it out of.
7/01/2013
Today I decided to look into sculptures that serve a function, and others that just took my interest. I found seating is the most obvious and popular type of sculpture with a function which I think could be a great idea to incorporate, maybe modify and park bench or a seating arrangement in a shopping centre.
When researching I came across sculptures that incorporated fire, and my mind travelled to maybe incorporating fire and water together. Looking into the water sculptures I came up with the idea of using photographs of water splashes to find the forms that could inspire the shape or more ideas for my sculpture. As water reminded me of glass I thought I could do a plaster mould of a splash form, and then add crushed glass to create a solid form.
First attempt

Having never done a plaster mould before I made the clay form to fragile and intricate, not realizing it would need to be scraped out after the plaster had set after preparing and pouring the plaster in, the clay form collapsed and when set it was impossible to remove all of the shape.
This is how to correctly prepare a plaster mould, clamping the sides together and then using a line of clay to make the inside water tight therefore ensuring there are no leaks.
I prepared another mould and made a simpler clay form, which I then placed inside the mould and poured the plaster into.
12/01/2013
Second attempt:
The second attempt worked really well, it wasn’t quite the shape of a water splash but I managed to produce a solid piece of glass with a smooth finish and interesting speckled effect.
Finished result:
It came out really dark due to the addition of the black pieces of glass in the mix, next time if I wanted the speckled effect I will ensure to take all of the black out to lighten up the glass.
Again I researched into some more sculptures to gain inspiration.
I also looked further into glass, looking at different techniques I could use:
Slumping- where a sheet of glass is heated over a clay form in the kiln, Frosting- sand blasting a piece of glass, Combining metal with glass (slumping a glass sheet already with metal mesh inside), Using sequined glass, Adding objects in glass (marbles), Fused mosaics.
There was one in particular from a Japanese book that I found interesting, it is an arm chair by Miss Blanche, 1988 where she has used a floral print with clear class its beautiful! This gave me the idea of using clear glass but adding objects, or squirting paint/ink to it giving some originality. Due to facilities I was told the ink squirting couldn’t be done with glass but resin is a good alternative.
Here I cut out sample piece formers out of wood to be vacuum formed to create the rectangular shape; I had to round the edges to prevent puncturing plastic.
I then mixed resin with a catalyst harder and poured the solution into the sample spaces squirt ink in different ways.
I used a syringe to squirt different coloured inks into the resin before it dries, I also dripped the ink making large droplets and then on some added resin over that to see how well layering the materials work out. I also added ink through the half way stage and when fully dried, all creating different effects. I found that due to the ink being water based indentations were made and only slight colourings occurred, although once turning the experiments over they seemed to of worked better. This material would definitely be a quick and easy alternative to glass.
14/01/2013
After doing further research looking at figure sculptures, from Anthony Gormley, Nikki Rosato, it has got me thinking about the combination of materials maybe metal and glass? This is something I could experiment with at a later stage.
I started a plaster mould today, inspired by…. making her own sheet of glass, I thought I could experiment with reacting similar circular glass shapes and then fuse them together to make a sheet.

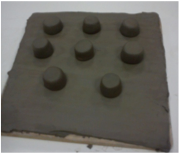
Here are the clay shapes I made ready to go into the plaster mould, this is the negative space of the mould so will be the shapes of the glass pieces. I then made a plaster mould out of this and left the clay to harden until next lesson allowing it to be easier to take out.
I also crushed the lumps of gaffer glass ready for when experiment is put into the kiln.
18/01/2013
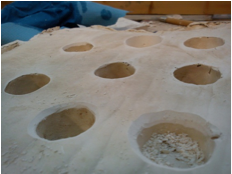
After leaving the plaster mould to dry, I took the clay out. I will now need to sponge down the mould and take the sharp edges off carefully with scissors; also I will need to ensure the whole mould is level.
As you can see here I have started bevelling the edges, this make sure the glass can be taken out easier.
The mould has been levelled out and the kiln has been clean to ensure none of the atmosphere interrupts the process. Then the mould was placed in and heated.
Today was group review day this was my feedback:
21/01/2013
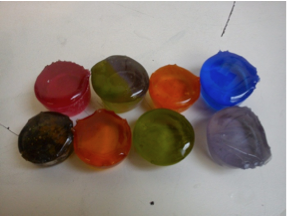
Today I broke the plaster mould away from the small glass circles I made to then me formed into a sheet. They turned out a lot better than I expected! I was really happy with the vibrant colours and putting them all together with their repetitive forms. They reminded me a lot of sweets which are simple, repetitive forms giving me an idea of using these small repetitive forms to create my project.
I had to take off the sharp edges with a glass grinder and wet and dry the plaster off, although this is a very effective experiment I found if I was to do this for my final major it will be extremely time consuming.
We started talking about contextual references for my piece something to drive me forward with and I was shown other peoples work from the exploratory stage to try and spark a new idea and something to research further. One girls work in particular grasped my interest with her idea of using oversized buttons, inspired by Claus Olerburg. I thought I could incorporate simple forms like this into my design maybe to make a park bench!
25/01/2013
After researching more into Claus Olerburg, I really like the originality of his work and how interesting his pieces are, I would love to carry these factors through to my work. I was struggling on what concept to follow through to repeatedly make for my piece, I thought of sweets as my experiments look like sweets but I thought due to the time to make this project, simpler shapes might be a better. Also, the fusing of glass pieces will be very difficult and risky for my final piece.
Another idea I thought of doing was to get three of my peers to write three random words onto a piece of paper to try and spark a new thought process.
I decided to experiment with different coloured sheeted glass today, adding enamels, and chemical powders layering glass to see how it reacts in the kiln. I simply used the scrap pieces of sheeted glass from the college, so will be interesting to see whether they are all the same compatibilities.
I used these scrap geometric glass sheets where by I added powders, enables, metals to see what reactions and outcomes would occur.
I was really pleased with the final outcome, and found it interesting to see how the different techniques worked. Due to compatibility issues their was slight internal cracking between the sheets, but other than that all the glass pieces fused together nicely. The powder seemed to work really well, it added slight colour and texture to the piece, which I could definitely include into my final piece. Adding water to the enable did not seem to work as well as planned, although layering the enamel and powder over the copper metal seemed to work really well!
 Here is a picture of the media’s layered over the copper foil.
4/02/2013
Today I started thinking about whether sheeted glass would be a better type to use; Jeremy Langford used clear stacked glass to create mind blowing detailed sculptures. Maybe this would be a better idea to take forward as I would be able to create more detailed sculpture and also the layers of glass would create a stronger foundation if needed for its function.
Due too not having specialist equipment the alternative option would be to layer resin instead of glass, as the shapes could be cut out in wood and then vacuum formed.
My main focus today was experimenting with fusing the glass circular pieces together, I wanted to see if I could just almost ‘tack’ the pieces together still keeping the form, so if I was to make repetitive sweet forms the shape would be kept. Although, if this was to be functional, which was one of my initial ideas, I would also have to consider the strength of the connectivity to ensure the piece would be strong enough for a functional purpose. Maybe, I could reinforce the pieces by adding a clear glass sheet underneath to add another layer of strength.
I simply just placed the two circular samples on a glass sheet ensuring their touching. Due to using sheeted glass and gaffer glass their will more than likely be compatibility problems, which may lead to internal or external cracking, weakening those areas.
8/2/2013
I checked to see how well the glass fused together today, seeing if the sheeted glass did crack and therefore would weaken the structure.

As expected cracking did occur almost the glass sheeting, due to compatibility issues between the two types of glass. However, the gaffer glass samples seemed to fuse really solidly together so would be ideal for creating a strong, solid glass sheet. Here I did try to only tack fuse the pieces to see if they still kept their original form intact, obviously the temperature was too high as they have totally misshaped. Therefore, I will definitely have to do some more experiments to find the perfect temperature to only tack the glass together.
Today I decided to combine glass and metal, testing the reactions and capability of both materials. I made sure I did a little research before doing so and some metals when heated can prove harmful.
I made another plaster mould again similar to the first glass experiment, but this time doing rectangles so it would be easier to fit strips of metal into.

After leaving the plaster mould to dry, I took the clay out and bevelled the edges again and crushed different coloured glass ready to put into the sample spaces.
I used:
clear glass & small holed steel mesh
Amber & copper sheeting
Clear glass & chicken wire
Clear glass & steel holed
Clear glass & Steel tracks
Green glass & copper wire
Clear glass & copper sheet shavings
11/02/2013
Here are the outcomes of combining the materials:


Today was another feedback session, I found this one really useful as it takes about exhibitions I could visit in London and how I need to define a form concept.
16/02/2013
After talking about ways of displaying the final major project pieces, I thought due to using glass I could incorporate light, looking into refraction and how that could be presented either through the physical pieces itself, when displayed.
I decided to see how much light would be able to go through the glass pieces or even if they could somehow refract.
Here are my results:
I found the colours gave a warm glow which would look really good for when displaying my work, although to incorparate the refraction idea I would have to physically position each repetitive form into lines like the colours of the rainbow.
25/02/2013
Today I annotated some of my sketchbook, and whilst annotating my refraction experiment I came up with an idea of maybe recycling small light bulbs and taking the screw and inside out just leaving the hollow dome forms. Then i could add different metals, textures and materials inside not having to worry about compatibilitys or anything. The only thing that would be the problem would be trying to connect them together, maybe I could thread wire through the sides of the bulbs and then by weaving the wire, creating my own mesh sheet, that would hold the whole structure together.
Also today, I made the mould for making my own sheet, all I needed to make was a flat rectangular mould where by I could put my already made circular sample pieces to see if they all fuse together and lie flat.

Here I used a piece of MDF as the negative space for my plaster mould, I decided not to use clay as I wanted to create an exact rectangular shape. I put slip over the wood to make it easier for it to come out when the plaster mould is dry.
30/02/2013
The wood was extremely difficult to pull out once leaving the plaster mould over night, this was due to the slip soaking in to the fibers so next time I won’t apply the slip over the top, maybe I could vacuum form a shape instead as the polymer wouldn’t need slip and also it would create a smoother mould.
As you can see some slip was still left once the MDF was pulled out, therefore I cleaned the mould down ensuring to remove all of it as it would effect the glass once fired. If I was to do this in my final major I would have to consider the kiln size which would obviously effect how big I could make the sheet, maybe I could do a series or set of shapes.
 Here is how I positioned the glass pieces in the mould, I took the measurements of each piece and the distance they were away from each other so if this doesn’t fuse together solidly I can be sure next time to know the spacing needed.
The time/ tempreture of the kiln was perfect, although I had spaced the glass pieces too far apart meaning their was two parts rather than one whole sheet.
After doing all of my experiements both glass/ resin I realise I need an actual theme to carry through for my final major project. Looking at these separate pieces it could simply be just repition, including different materials, methods, techniques, although I feel a a better more deep theme/ direction could come out of it. I came up with ‘Perfection in Inperfection’ this sort of makes the viewer think harder and will definately gage different opinions on what perfection is, this is my theme for my FMP.


Leave a comment